Paint Your Kitchen Cabinets a Bold Color This Spring, Before the Trend Peaks and Everyone Else Does
White cabinets aren't the safe choice, they're the expired one. Here's how to pick a bold cabinet color, nail the finish, and commit with confidence.
Every white kitchen you’ve ever admired on Instagram was following a trend. Not expressing a preference. Not making a design decision. Following a trend, one that peaked around 2017 and has been coasting on inertia ever since. The reason your all-white kitchen feels vaguely unsatisfying isn’t because you chose the wrong shade of white. It’s because you didn’t actually choose at all.
”Safe and Classic” Is What People Call a Trend They Don’t Want to Repaint
Here’s the thing about white kitchen cabinets that nobody in the home improvement industry wants to say out loud: they were a trend. A massive, industry-wide, flip-every-house-on-HGTV trend that got so big it stopped looking like a trend and started looking like a natural law. Granite countertops did the same thing in the early 2000s. So did honey oak in the ’90s. Every era has a kitchen default, and every era’s default eventually looks dated in the exact way its proponents swore it wouldn’t.
The word people use is “classic.” But classic is just what you call something when you bought it at the peak and can’t stomach the idea of redoing it. White shaker cabinets with brushed nickel pulls weren’t classic in 2016. They were trendy. They just happened to be trendy at a scale that made them feel inevitable.
I’m not saying white kitchens are ugly. Some of them are genuinely beautiful, especially when the white is warm and the rest of the room has enough texture and contrast to keep things interesting. But if your kitchen is white because you thought it was the safe choice? That safety has an expiration date, and we’re past it.
Bold cabinet color (actual, deliberate, this-is-a-real-color color) ages better precisely because it’s a choice. Nobody paints their cabinets forest green by accident. There’s intention behind it, and intentional design is the only thing that actually holds up decade over decade.
Forest Green, Electric Blue, Plum Noir: The Case for Going All the Way
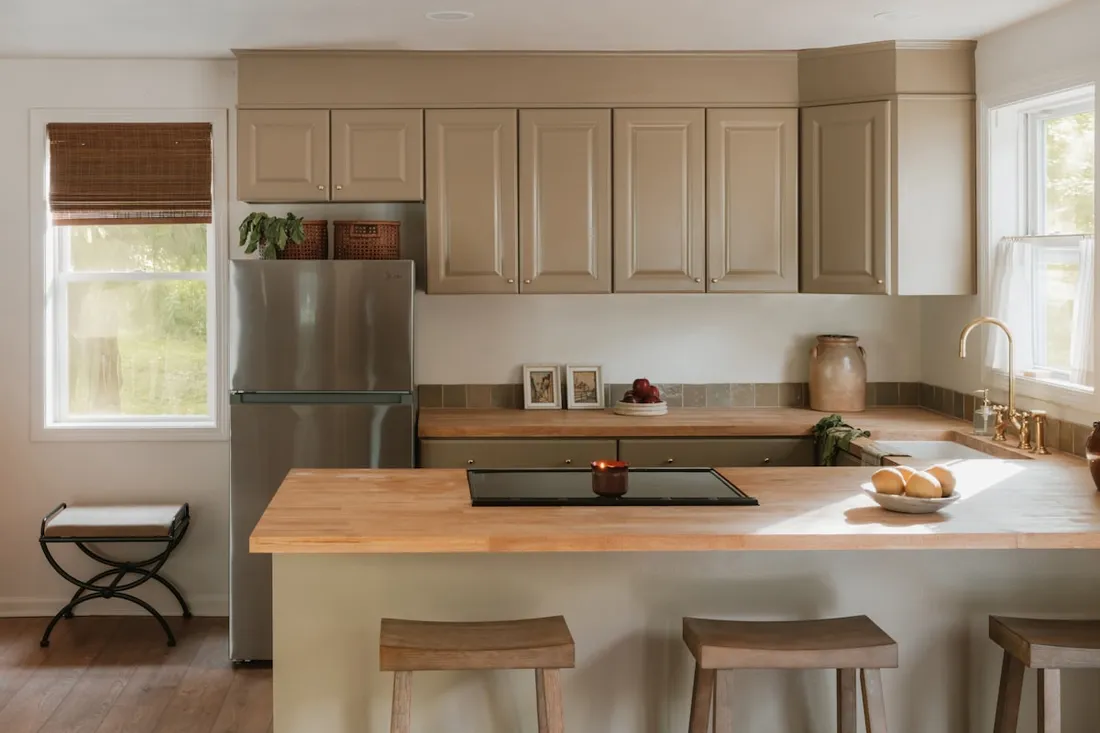
If you’re going to paint your cabinets a color, make it a color. Not sage. Not dusty blue. Not “greige but slightly more green.” Those are the design equivalent of whispering. You wanted to say something but lost your nerve halfway through.
The three shades I keep coming back to this year:
- Forest green: specifically Benjamin Moore Essex Green HC-188 or Sherwin-Williams Roycroft Bottle Green SW 2847. Deep, grounded, looks incredible against white marble or warm butcher block. This is the one I painted in my rental kitchen, and it’s the one I’d paint again tomorrow. (More on that story in a minute.)
- Electric blue: not navy, which has been done to death. I’m talking about something closer to Farrow & Ball Hague Blue No. 30 or Benjamin Moore Champion Cobalt 2061-20. It sounds insane until you see it with brass hardware and a white stone countertop. Then it just looks… right.
- Plum noir: Benjamin Moore Shadow 2117-30 or Sherwin-Williams Blackberry SW 7577. This one’s for people who want dark but don’t want black, which reads flat on cabinet doors and shows every fingerprint. Plum has depth. It shifts in different light. Under a warm pendant, it almost glows.
All three of these work because they have enough black in them to feel grounded in the room rather than floating on the surface. That’s the difference between a bold color and a loud one. Bold sits in the space. Loud fights with it.
One thing I’ll say: if you’re drawn to a color but worried it’s “too much,” that worry is almost always wrong. I’ve gone back and forth on this over the years, but at this point I’m pretty confident: the regret almost never comes from going too bold. It comes from not going bold enough and ending up with a color that reads as a mistake rather than a commitment.
Satin vs. Lacquer: Why Finish Matters More Than Color
You can pick the perfect green and ruin it with the wrong finish. This isn’t talked about enough. The sheen on your cabinets determines how the color actually lives in your kitchen: how it catches light, how it cleans, how it ages.
Satin finish is where most people should land. It’s got just enough reflectivity to read as intentional without turning your cabinet doors into mirrors. It’s forgiving on imperfect surfaces (which is every surface in a rental and most surfaces everywhere else). It cleans well. It doesn’t show brush strokes as aggressively as semi-gloss, and it doesn’t go chalky the way matte does in a room where grease and steam are constant realities.
Lacquer is gorgeous. Full stop. That deep, almost wet-looking sheen you see on high-end kitchen cabinets in design magazines? That’s lacquer. It’s also expensive, usually requires professional spray application, and shows every imperfection in the surface beneath it. If your cabinets are solid wood with flat panels, lacquer can be stunning. If they’re thermofoil or MDF with any warping at all, lacquer will announce every flaw like a spotlight.
Semi-gloss is the old default, and I genuinely think it’s the worst option for bold colors. It reflects too much light, which makes dark colors look plasticky. It shows every brush stroke. It’s fine on trim and baseboards. On a large cabinet surface in a deep plum? Not even close.
For the actual paint, Benjamin Moore Advance is the gold standard for cabinet work, a waterborne alkyd that self-levels beautifully and cures to a hard finish over about two weeks. A quart runs around $30. Sherwin-Williams Emerald Urethane Trim Enamel is the other serious option, around $45 a quart but slightly more durable long-term. For either one, satin sheen. Don’t let the paint counter talk you into semi-gloss.
Pairing Bold to What’s Already There
This is where most people panic, and it’s also where the advice gets uselessly vague. “Consider your existing surfaces” helps nobody. So let’s be specific.
White or light stone countertops (marble, quartz, light granite): You’ve got the easiest pairing in the game. Almost any bold cabinet color works because the counter provides enough visual breathing room. Forest green with white marble is a combination that makes me feel physically calm. Electric blue with a white quartz like Caesarstone’s Calacatta Nuvo does the same thing with more energy.
Butcher block or warm wood countertops: Go green or plum. Blue against warm wood can work, but it takes careful hardware choices, and you’ll want brass or unlacquered bronze to bridge the warmth. Skip chrome here. Butcher block with forest green cabinets and brass cup pulls is one of those combinations that looks like it’s been there for decades, in the best way.
Dark countertops (black granite, dark soapstone): This is where you need to be more careful. Dark-on-dark can absolutely work, but you need strong lighting underneath the uppers and something light on the backsplash to keep the whole kitchen from collapsing into a cave. A white subway tile (yes, the basic one, the $0.15-per-tile one from Home Depot) does the job perfectly here.
Hardware is the easiest lever you’ve got. If the cabinets are doing the heavy lifting on color, keep hardware simple. My rules:
- Green cabinets: brass or unlacquered bronze. Every time.
- Blue cabinets: brass for warmth, matte black for edge. Both work.
- Plum cabinets: matte black or (if you’re feeling it) aged pewter.
Don’t overthink the pulls. Rejuvenation’s Massey pull in natural brass ($12-18 per pull depending on size) is almost offensively versatile. If that’s outside your budget, Amerock’s Extensity line on Amazon runs about $4 per pull in champagne bronze and looks three times the price.
The Peel-and-Stick Test, Especially Before Going Dark
I stole this trick from my friend Sarah, who’s an actual interior designer and therefore has better instincts than me but is also more cautious, which means her tricks tend to be very practical.
Before you commit to a bold color, buy a sample pot ($8-10 at any paint store), paint a large piece of poster board or foam core (at least 18 x 24 inches) and tape it directly to your cabinet door with painter’s tape. Leave it there for a full week. Not a day. A week.
You need to see the color at 7 AM with grey winter light coming through the window. You need to see it at 6 PM under your kitchen pendant. You need to see it while you’re making coffee and not thinking about it at all. That last one is the real test: does the color still feel right when it’s just background? When it’s just your kitchen and not a project?
If you’re considering a dark color (the plum, the deep green), do this test on a north-facing surface if you’ve got one, where the color will get the least natural light. If it still looks good there, it’ll look good everywhere.
The peel-and-stick vinyl versions of this (brands like Tempaper make cabinet-sized samples for around $5-8) work too, and they give you a sense of the finish as well as the color. But the paint sample is more accurate to the final result.
This step takes ten minutes and a week of patience. It will save you from a $200 mistake or confirm a $200 investment. Either way, worth it.
For Renters: How I Did This Without Asking Anyone
Okay. Here’s the part where I admit something that might be either inspiring or reckless depending on your relationship with your landlord.
Two years ago, Danny and I were staring at our rental kitchen (original 1970s cabinets, painted a yellow that had aged into something closer to nicotine) and I decided I was done looking at it. The cabinets were already painted, which meant they’d been painted at least once before, which meant I could paint them again. (This is a key detail. If your rental cabinets are raw wood or a factory laminate finish, the calculus is different.)
I bought a quart of Benjamin Moore Advance in Essex Green, a foam roller, a small angled brush, and a $6 pack of 220-grit sandpaper from the hardware store on Hawthorne. Total cost: about $40. I sanded the cabinet fronts lightly (you’re not stripping them, just giving the new paint something to grip), wiped them down with a damp cloth, and painted two coats over a Saturday afternoon. The foam roller is important here: it leaves almost no texture, which matters on smooth cabinet surfaces. (I used a brush on the inset panels and the roller on the flat frames. This took forever. I’d recommend the same approach.)
The green looked dark in the can and I had a full moment of terror when the first coat went on. But here’s what nobody tells you about dark cabinet paint: it’s supposed to look uneven and terrifying at one coat. The second coat is where it comes together. By Sunday morning, the kitchen looked like a different room. Not a renovated room, just a room that had been waiting for this color. It felt heavier, in a good way. The cheap quartz countertops, which I’d always thought looked flat and boring against the yellow, suddenly had depth against the green. Even the weight of opening the cabinet doors felt more satisfying, which makes no physical sense but I’m telling you, context changes perception.
I didn’t tell the landlord for three months. When he came by to fix the garbage disposal, he stood in the kitchen doorway for a full ten seconds without saying anything, and I was convinced I was losing my deposit. Then he said it was the single best improvement any tenant had ever made to the apartment and asked if I’d consider doing the bathroom next.
I’m not recommending you paint without permission. (I mean, I kind of am. But I’m not officially recommending it.) What I am saying is that cabinets that are already painted are repaintable, and a quart of paint to return them to their original color is cheap insurance. Keep the old paint chip. Know your exit strategy. Then go live in the kitchen you actually want.
If you’re planning a bigger spring refresh this year, cabinets are the single highest-impact change you can make in a kitchen, bigger than new hardware, bigger than a backsplash, and roughly one-twentieth the cost of new countertops. And while you’re at it, bold cabinets are a perfect excuse to finally tackle the organizational chaos behind those doors.
Why Now?
Bold kitchen cabinets aren’t new. Designers have been doing them for years. But there’s a window (and we’re in it right now) where the idea has crossed from “design-world thing” to “real people are actually doing this” without yet hitting the saturation point where every kitchen on every home tour looks the same.
That saturation is coming. I’ve seen the same forest green cabinet kitchen on four different brand accounts in the last two weeks, which means the content machine is spinning up. By fall, green cabinets will be where white subway tile was in 2018: everywhere, unavoidable, and already starting to feel expected rather than exciting.
The difference between doing something before the wave and after the wave is simple. Before: it’s yours. After: it’s everyone’s. The color is the same either way, but the feeling of walking into a kitchen you chose (really chose, not just followed) is different. That’s the part that holds up. Not the trend, not the color forecast, not what’s on anyone’s mood board. The fact that you looked at your kitchen, looked at a can of paint, and made a decision that scared you a little.
That’s worth more than any shade of white ever gave anyone.